Showing posts with label light fixture. Show all posts

Wednesday, March 20, 2013

Light fixture DIY

We started with an ugly ceiling fan in our kitchen, which was later replaced with a prettier ceiling fan.  First the fan stopped spinning, and then eventually it stopped lighting up as well.  It was a dusty, non-functioning, eye sore that had to go.  I started looking at suitable lighting to take its place, but the prices were a little disheartening.  Then one day my dad showed up with a glass globe light.  He had an extra that he'd picked up from the RE-store, and it was mine if I wanted it.  The first thing I did, was spray the rusted brass with a metallic silver spray paint.  I felt like it still needed something, but I wasn't sure how to precede.   I ended up going to an estate sale a block away from my house.  It was the sort of sale that said in big, bold letters; "NO EARLY BIRDS"!  I dutifully obliged, and showed at exactly 9 o'clock.  It was apparent that they had started earlier though, because the couple of great finds were already spoken for.... I found a cool Samsonite makeup case that matches a suitcase I bought last year, but not much else.  Then I went into the garage and buried under an inch of dust was a 1950s drum light shade with hand stitching.  They didn't even charge me for the shade, b/c it was trash to them.  The shade was originally tan colored, so I sponge painted it a minty aqua and drew gold stripes with a paint pen.  I love the way the final light turned out.  It has a sort of art deco vibe, and it cost me $4 total (the cost of a paint pen!)
aqua gold DIY 1950s globe light fiberglass handstitched shade Just Peachy, Darling
What do you think?


Monday, December 10, 2012

Hopin' and Wishin'

My kitchen progress is coming along, slowly, but surely.  Finding all the right pieces takes a lot of patience, and of course budgeting for some of the more expensive changes has to be accomplished one improvement at a time.  This year, we painted the cupboards peacock blue, created a chalkboard refrigerator and added to our collection of colorful 1950s housewares, including our pastel ceramic Monterey dishes.  My goals for 2013 are: finding the perfect retro oven (it has to be one of the harder to find 30" models), replacing the light fixture above the dining table, and re-tiling the back splash.  Maybe by 2014, I can think about new counter tops?!?
teal cupboards painted cabinets blue chalkboard fridge pyrex vintage kitchen Just Peachy, Darling
wooden eat sign vintage trailer dishtowels retro 1950s stove oven kitchen Just Peachy, Darling
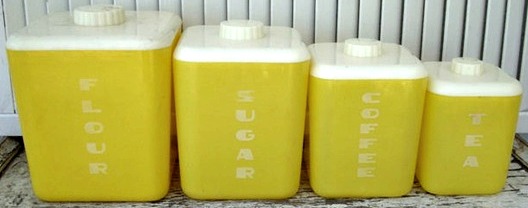
1950s plastic kitchen canisters Lustroware yellow Just Peachy, Darling
mint milkshake maker lemonade print lustroware reamer aqua starburst clock Just Peachy, Darling
1950s pastel dishes Amy Butler Coreopsis fabric George Nelson saucer light seafoam rotary phone Just Peachy, Darling

Bold indicates items that I covet, the rest is already in place. (From left to right): Our Peacock Feather blue cabinets, chalkboard fridge, white subway tile for the back splash,  vintage Pyrex, yellow wooden "eat" signAirstream kitchen hand towel,  1950s Wedgewood stove,  Yellow Lustro Ware canisters, "Why, yellow Gorgeous!" kitchen hand towel, mint green shake mixer, "Make Lemonade" printable,  aqua Lustro Ware reamer, gold star burst clock, pastel ceramic dishes, Amy Butler fabric in Coreopsis, George Nelson Saucer light, & mint green rotary wall phone.
What's your perfect kitchen?
XOX

Saturday, July 14, 2012

She's so bubbly

I finally ditched the boring pendant light above my kitchen sink.  I discovered a strange, space-age looking lamp at the thrift store for $20, that I thought had potential.  It reminded me of a movie prop from the film, "The Man That Fell To Earth" with David Bowie. 

 It weighed about 20 lbs and had a box made of wood, brass, and glass that surrounded it.  My husband, however, did not see its potential.

I had a friend help me take the "box" off and weld bigger holes on the top, so I would be able to mount it to the ceiling.  Actually, HE kind of looks like David Bowie.  

 I sprayed the entire fixture silver, after I taped off the electrical components.
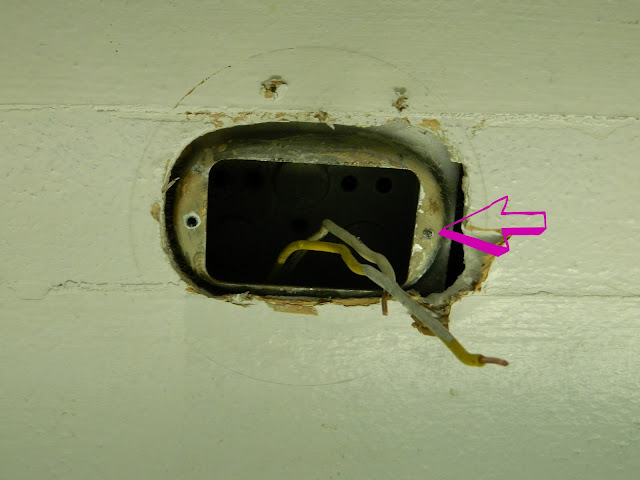
No project ever goes according to plan, and once I had our original fixture off the ceiling, I realized that the lighting box had a broken, headlless screw.
This meant, that the previous fixture had been hanging precariously above my head.  I googled how to remove the lighting box...thank heavens for the interwebs.  Basically, I had to chisel away all the plaster around the box, until I discovered the screws holding it into the ceiling joist.
The ceiling was officially looking really awful and my husband was cursing the "Bowie-delier."  I replaced the top of the lighting box, bought some new bolts and wingnuts and after many sweaty hours (Holding your arms above your head is HARD!) I finally had the fixture mounted.  Thankfully, the plaster damage is covered.
DIY upcycled vintage retro space age bubble chandelier light  Just Peachy, Darling
I love it! It's really whimsical, and reminds me of bubbles floating about my head while I do dishes...like in that scene, from The Labrinth...with David Bowie. ;)
Here is the before and after:
Builder's grade into a lazy sputnik chandelier.


Related Posts Plugin for WordPress, Blogger...